Clinical Maestro Okta Integration Configuration Guide
Supported Features
The list of supported provisioning features is the following
- Create Users
- Update User Attributes
- Deactivate Users
Requirements
The list of supported provisioning features is the following
- The System shall automatically add Okta users as
internal contacts, as Okta users are granted access to Maestro
- The System shall automatically remove Okta users from
the internal contacts list, as Okta users’ access to Maestro is
removed
Configuration Steps
To get started, reach out to Clinical Maestro support (support@clinicalmaestro.com) and let them know you want to use Okta for user provisioning. A support representative will provide you with a username and password specific to your organization.
1. Install the Clinical Maestro application
a. Go to the Applications menu in Okta
b. Click Add Application
c. Type “Clinical Maestro” in the search box
d. Okta should find the application. Click on the Add button.
e. Enter the subdomain of Clinical Maestro.
f. Click on the Done button.

2. Click on the Provisioning tab
3. Click on Integration
4. Click on Configure API Integration
5. Click on Enable API Integration
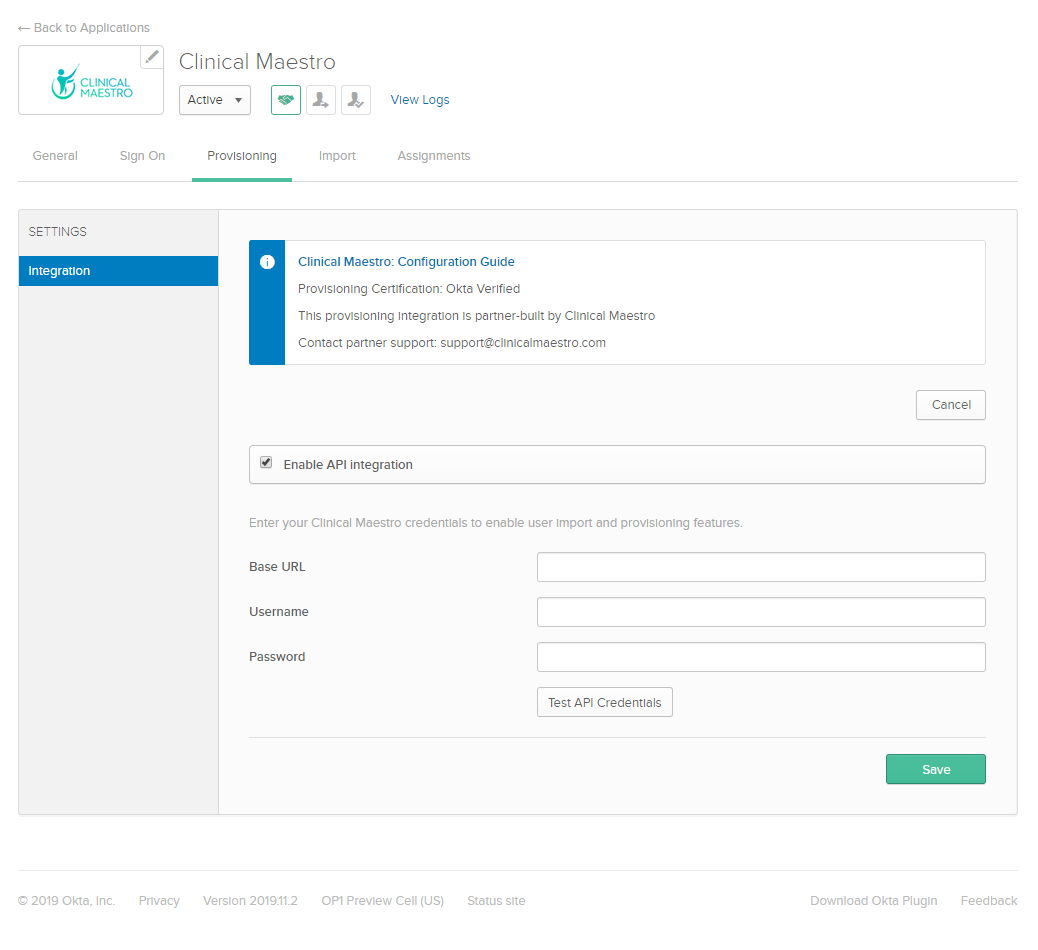
6.
Enter the base URL,
username and password provided by Clinical Maestro Support.
7.
Click Test API
Credentials; if successful, a verification message appears at the top of the
screen.
8.
Click Save.
You can now assign people to the app (if needed) and finish the application setup. In order to do that, you should do the following:
9.
Create
a Group which will contain all the users assigned to Maestro. You may call it
for example Clinical Maestro Users Group
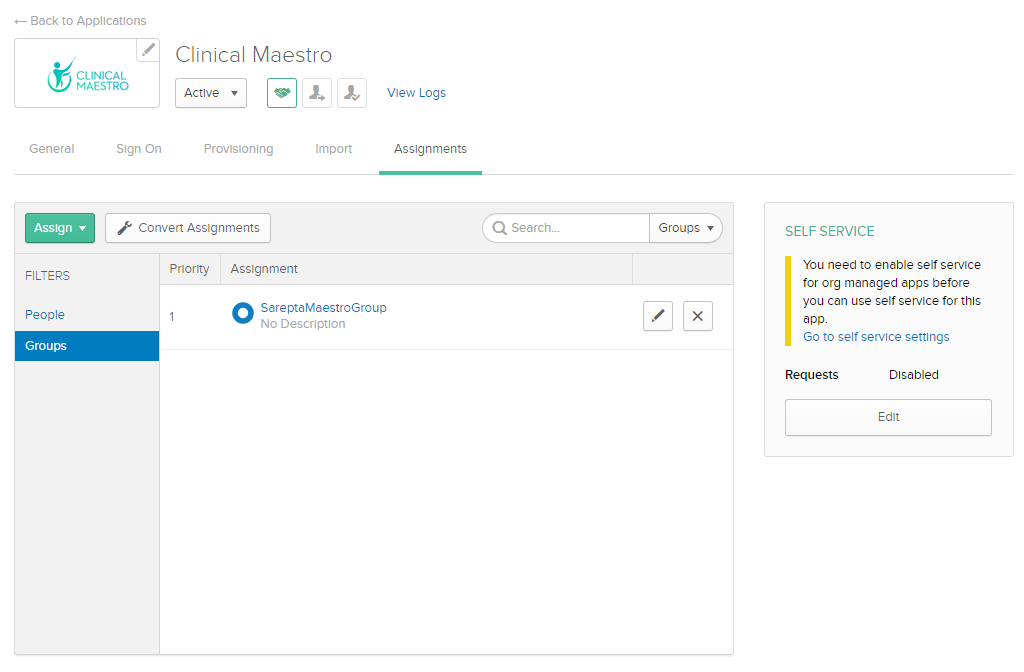
10. Assign the group to Clinical
Maestro
a.
Go
to Applications
b.
Click
on Clinical Maestro
c.
Click
on the Assignments tab
d.
Click
on the Groups tab
e.
Click
Assign
f.
Click
Assign to Groups
g.
Click
on the Assign button of the group you created before
h.
Click
Done
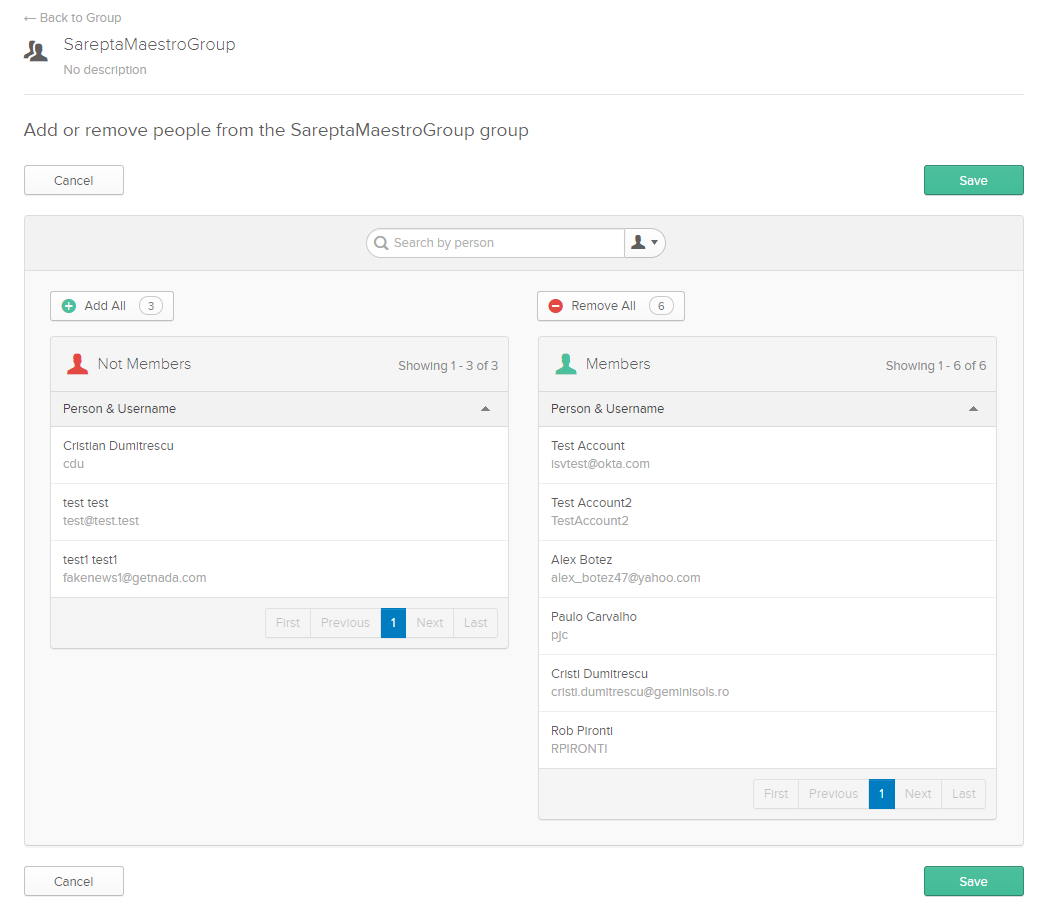
11. In order to add a user to Clinical Maestro, do the following (in Okta)
a.
Go
to Users > Groups
b.
Click
on the Clinical Maestro Users Group
c.
Click
on Manage People
d.
Hover
on a user and click the + or – buttons to assign / de-assign user from
group
e.
Click
Save
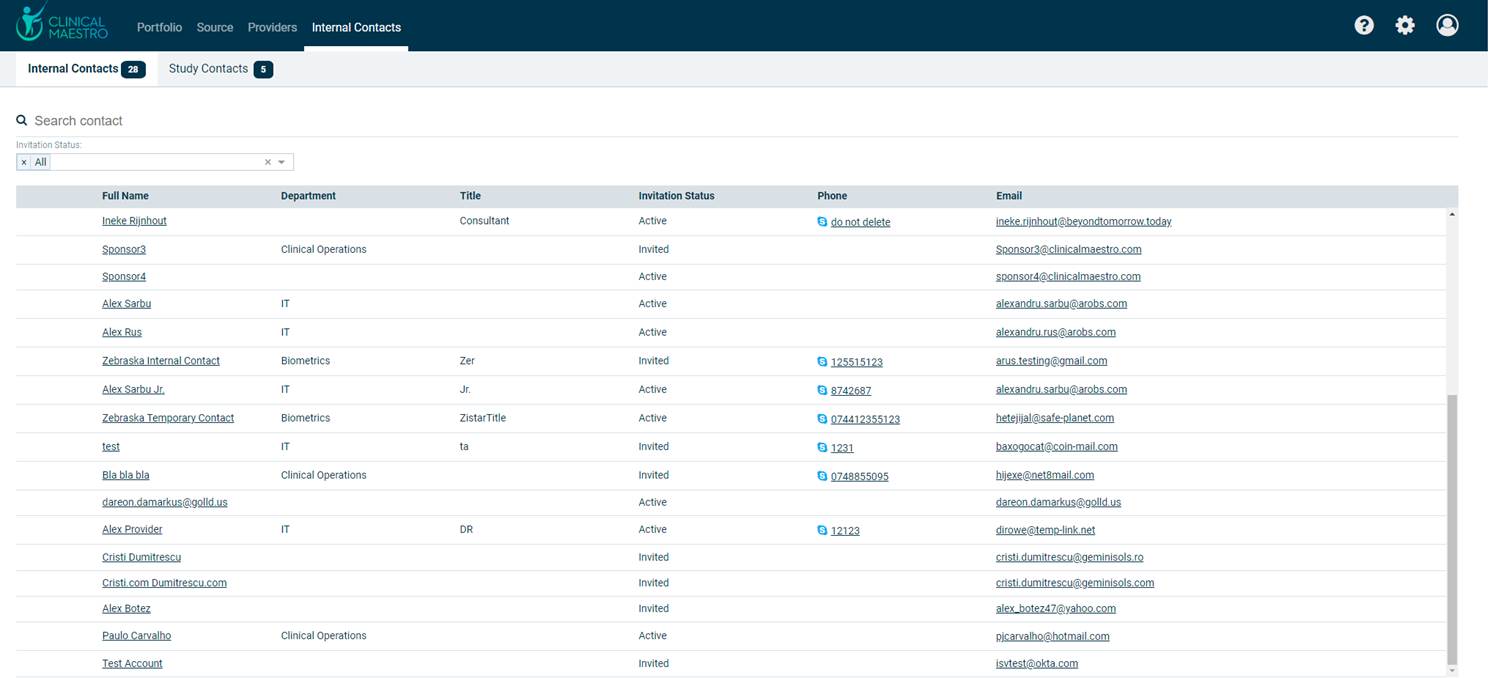
If you
added a user to the group, then the internal contact corresponding to the user
should appear in the Internal Contacts in Maestro.
If
you removed a user from the group, the corresponding contact should disappear
from the Internal Contacts list, in Maestro.
Attributes and
Mapping
The following Okta attributes are supported.
Attributes
|
Display Name |
Variable
Name |
Data
Type |
Attribute
Type |
|
Username |
userName |
string |
Base |
|
Given name |
givenName |
string |
Base |
|
Family name |
familyName |
string |
Base |
|
Primary email |
email |
string |
Custom |
|
Title |
title |
string |
Custom |
|
Department |
department |
string |
Custom |
|
Primary phone |
primaryPhone |
string |
Custom |
|
Primary phone type |
primaryPhoneType |
string |
Custom |
Known
Issues/Troubleshooting
In case you encounter any
issues, please contact Clinical Maestro Support (support@clinicalmaestro.com).
Note: When users are
deactivated in Okta, they will be deactivated in Clinical Maestro. Users will
not be able to login to the application, but their data will remain available
as an ‘inactive user’. To permanently delete user data, contact
Clinical Maestro Support, (support@clinicalmaestro.com).
Tips
N/A